Opportunity Actions
- 18 Mar 2024
- 2 Minutes to read
- Contributors


- Print
- Comment
- DarkLight
Opportunity Actions
- Updated on 18 Mar 2024
- 2 Minutes to read
- Contributors
- Print
- Comment
- DarkLight
Article summary
Did you find this summary helpful?
Thank you for your feedback
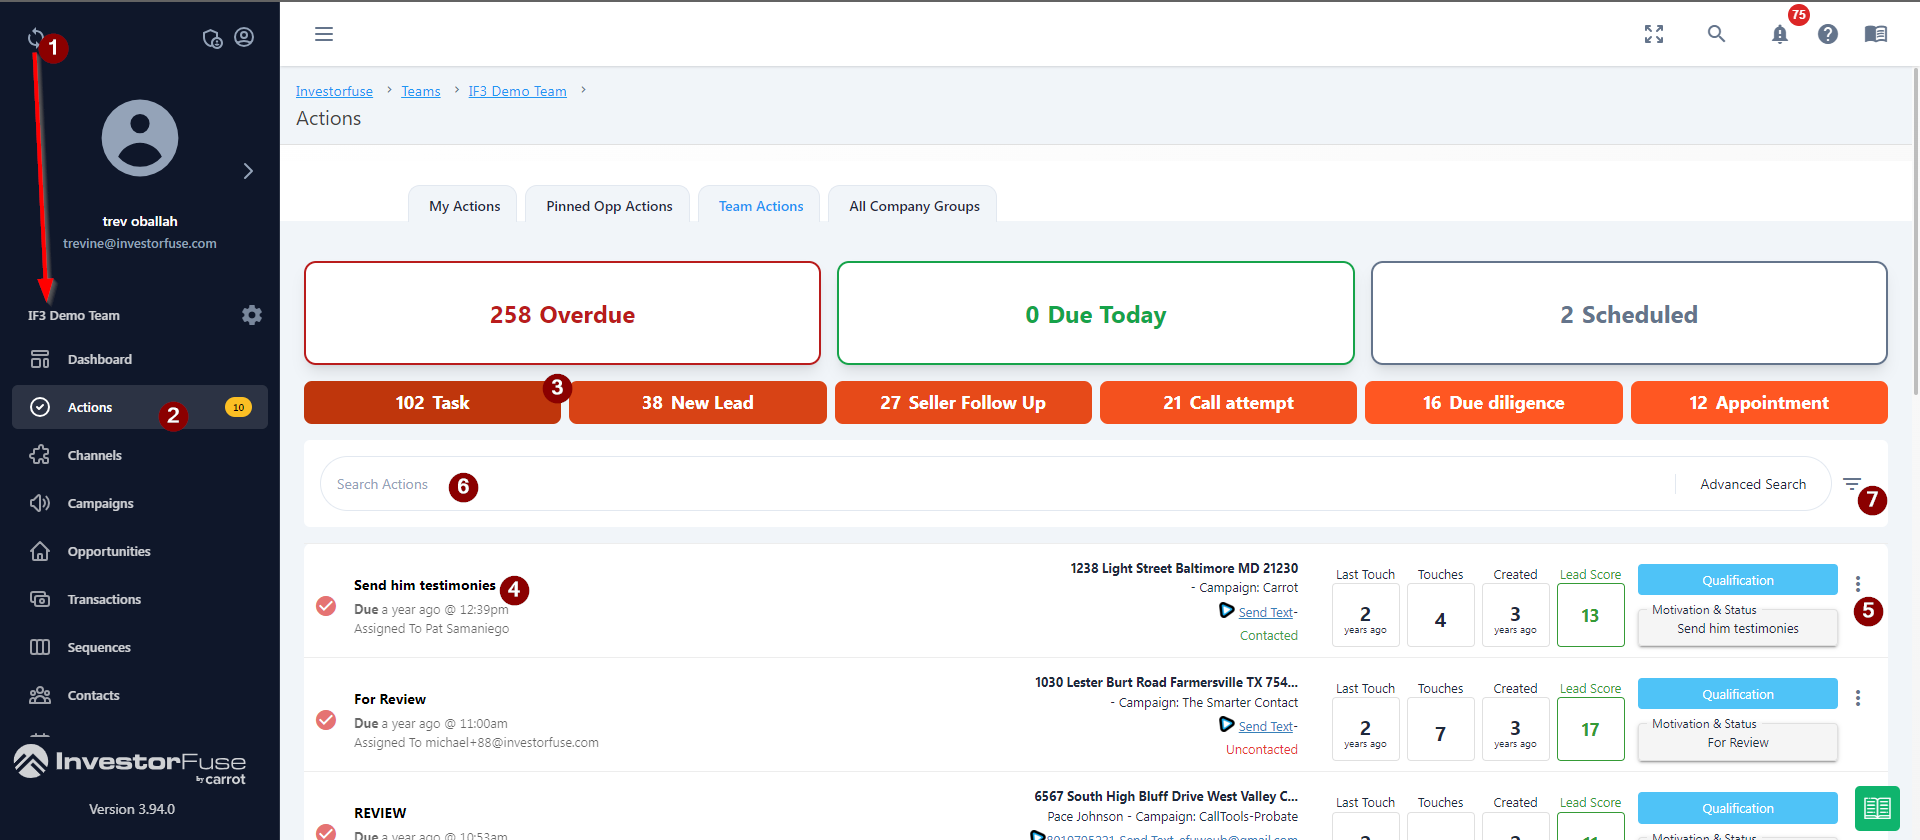
Team Actions is a collective information dashboard that shows your Actions for the specific Team you have selected in IF3.
You are able to select the Action Type you want to view by clicking on the headings and you're also able to search for specific actions from this location.
Access Your Actions
- Select a Team in the left menu
- Click Actions
- To easily filter the list, select the types of Actions you wish to view by clicking the checkbox in each category.
- Click the Action that you want to open
- You can assign the Action to someone else by clicking ⋮ the three dots to the right of the Action and then click Edit Action.
- The search functions work by typing the Action name, Seller name, Seller email, and Seller phone number in the Search Actions field.
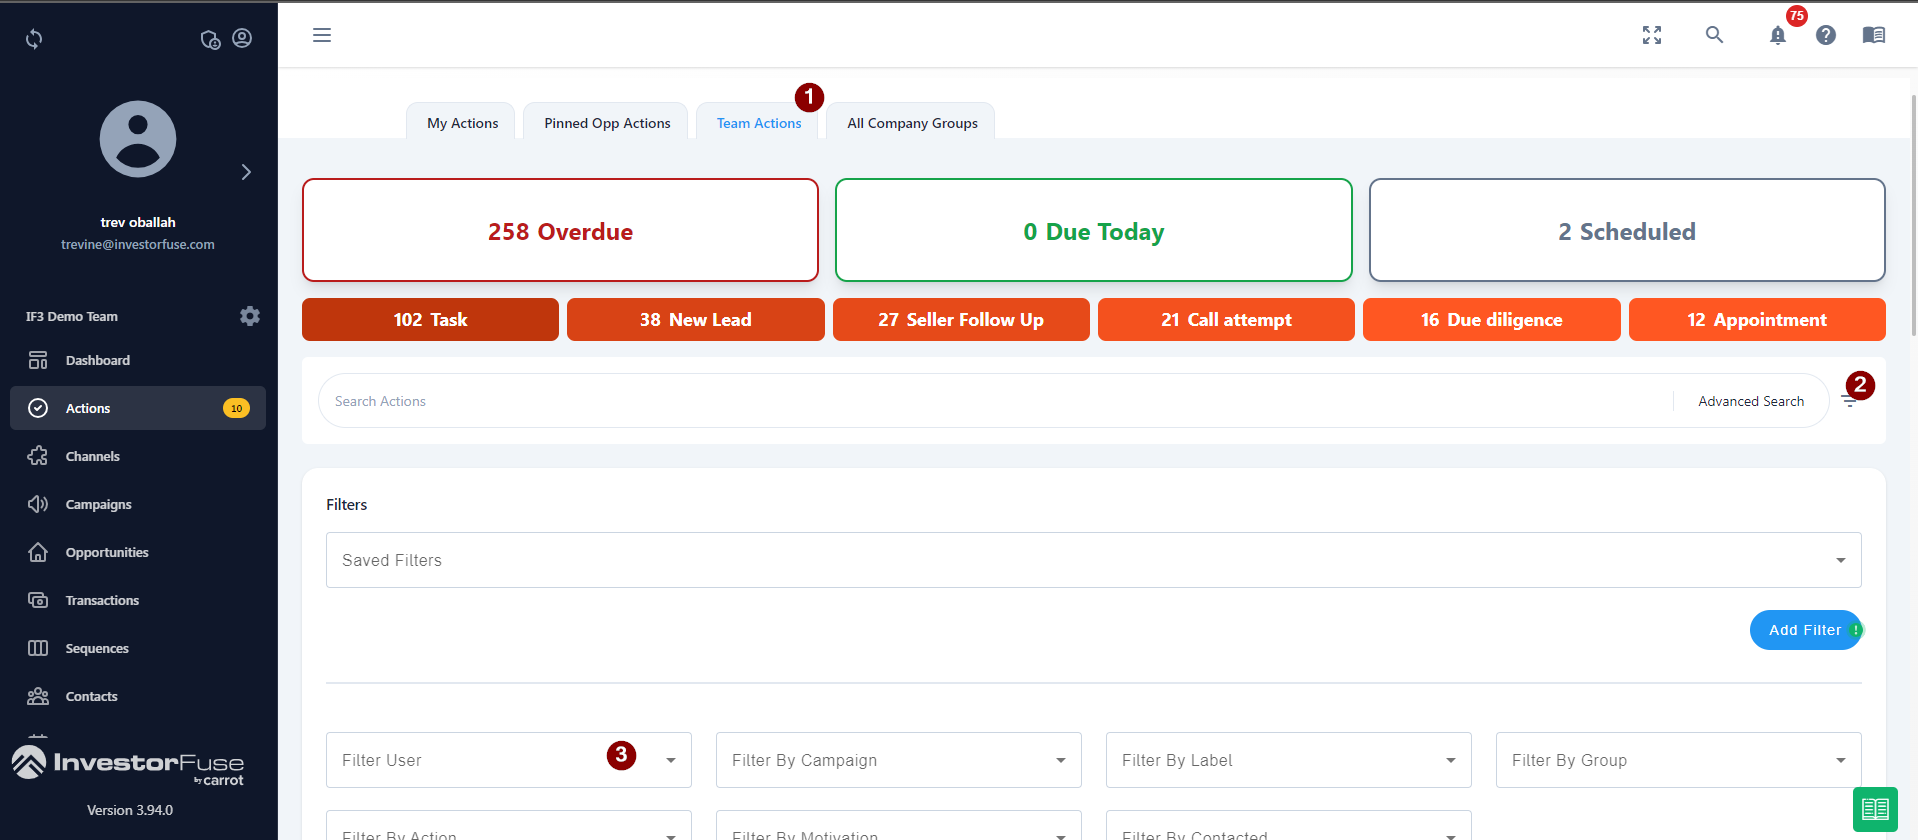
- For a granular filter, click on the Filter icon in the upper right and select the categories you want to drill into. You can sort it by the due date or just show today's actions.

Actions Color Code
Your list is color-coded based on the due date of the Action
- Green = Due today
- Gray = Due in the future
- Red = Overdue
Filter Team Members' Actions
You can see how many and what actions are assigned to other team members using filters.
- In the Actions section, click Team Actions to see all of the actions across the team.
- Click the Filter icon on the right-hand corner
- Select the user whose Actions you want to see

Update an Action
Actions can be accessed from two main locations within IF3. The first is from your Team Actions Pipeline and the second is from within your Opportunity.
- Select any Team in the left menu
- Click Actions
- Select an action you want to open
- Follow the on-screen instructions and select the outcome of the current action
- Click Next Step
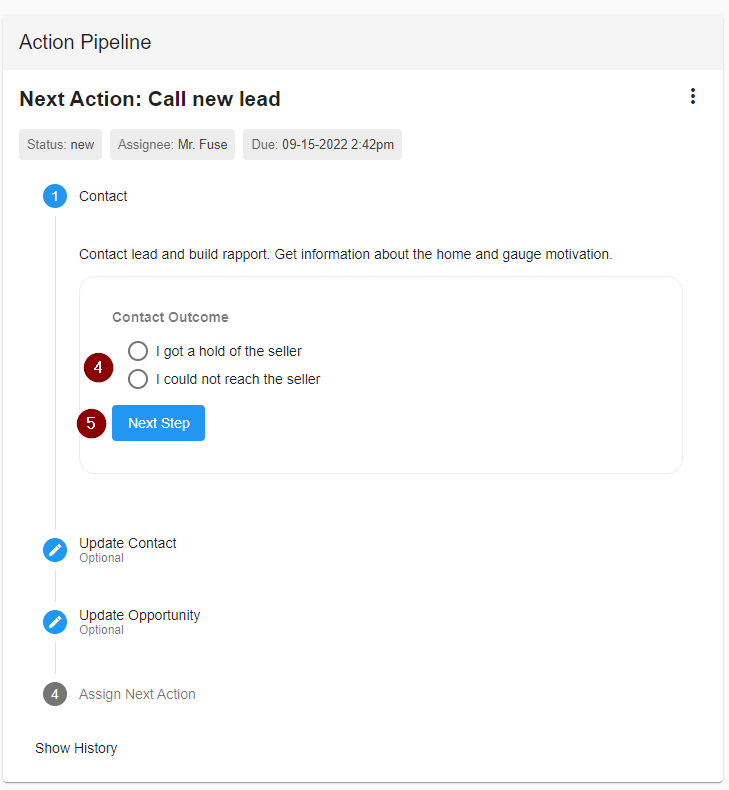
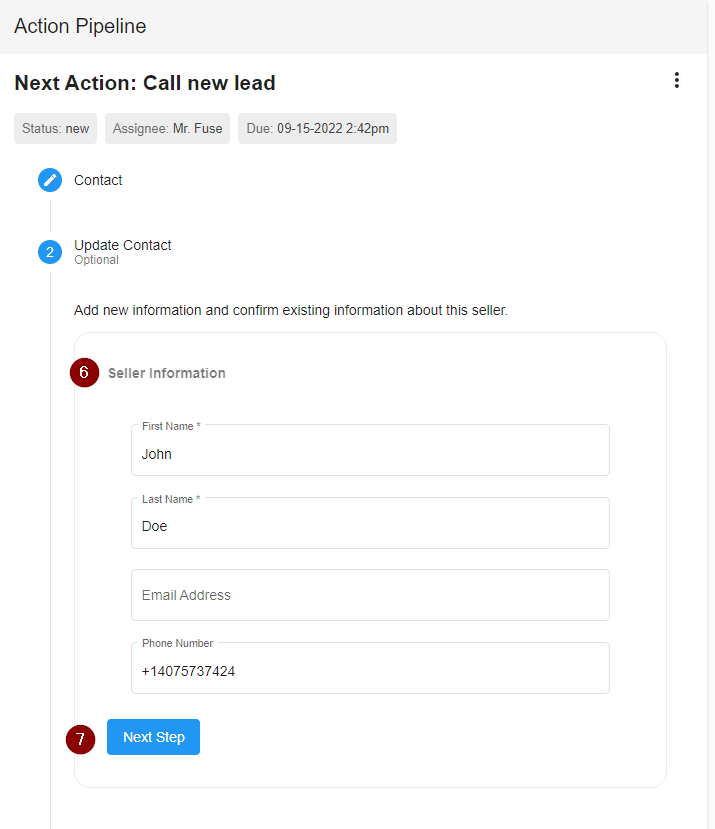
- Depending on where your Opportunity is in the Pipeline, other optional data can be entered or changed as it appears. For example, in the Call New Lead Action you'll be asked if you were able to reach the seller or not. If you look at the related data you'll see you can update the Contact or the Opportunity with new information.
- Click Next Step after you fill in the required and/or optional information.
- When you get to the end of the Action it will prompt you for the Next Action from the dropdown. Select the appropriate next action that you need to do for this opportunity.
- Select the person on your team who will perform this Action
- Check the box if you want to change the Opportunity Owner to the Action assignee
- Select a group where the Opportunity belongs
- Select Due In to have the system create a date for you based on the length of time selected
- or select a specific Date and Time
- Add instructions as needed for the person assigned
- Click Add to add the following Quick Adds:


- Text Message - sends a text message to the Seller
- Email - sends an email message to the Seller
- Comment - the comment will record on the Opportunity Activity Log
- Notes - the notes will record inside of the Opportunity. If there aren't any existing notes you can enter new notes, if notes already exist in the Opportunity you can edit the existing or add to them.
16. When you are finished filling out all pertinent fields, click Complete Action to complete this Action and create the new (next) Action

More on Quick Adds
Quick Adds are activities that you can set immediately while creating a new Action. The additional items you are able to perform while you're inside the Action include sending a text message, sending an email, adding a comment to the activity feed or adding a note to the Opportunity.
Was this article helpful?