Create, Edit, or Delete Custom Opportunity Forms
- 15 Aug 2023
- 3 Minutes to read
- Contributors


- Print
- Comment
- DarkLight
Create, Edit, or Delete Custom Opportunity Forms
- Updated on 15 Aug 2023
- 3 Minutes to read
- Contributors
- Print
- Comment
- DarkLight
Article Summary
Share feedback
Thanks for sharing your feedback!
You can use the default Opportunity forms within each Opportunity or you can create your own based on your needs.
Under the Property Details of each Opportunity is a section to create your own forms to your specifications. You can sort them how you'd like, you can create drop down menus with your own criteria, add all of the fields you want or have limited numbers of fields. Once you create a form it will change ALL forms throughout your Opportunities in each Team to the form that is selected. You can change your forms throughout as you wish without having to worry about data loss as the data will still be saved in the background.
Custom Form Types
You can create a custom form from each menu within the Property Details menu. The Property (Information), Pricing and Details menus each have their own forms. Consider naming each form accordingly to the location you want it to appear, your Details Form can be added to the Pricing section for example so you may want to make it obvious that the Details Form you've created is named as such to avoid confusion.
Create a Custom Opportunity Form
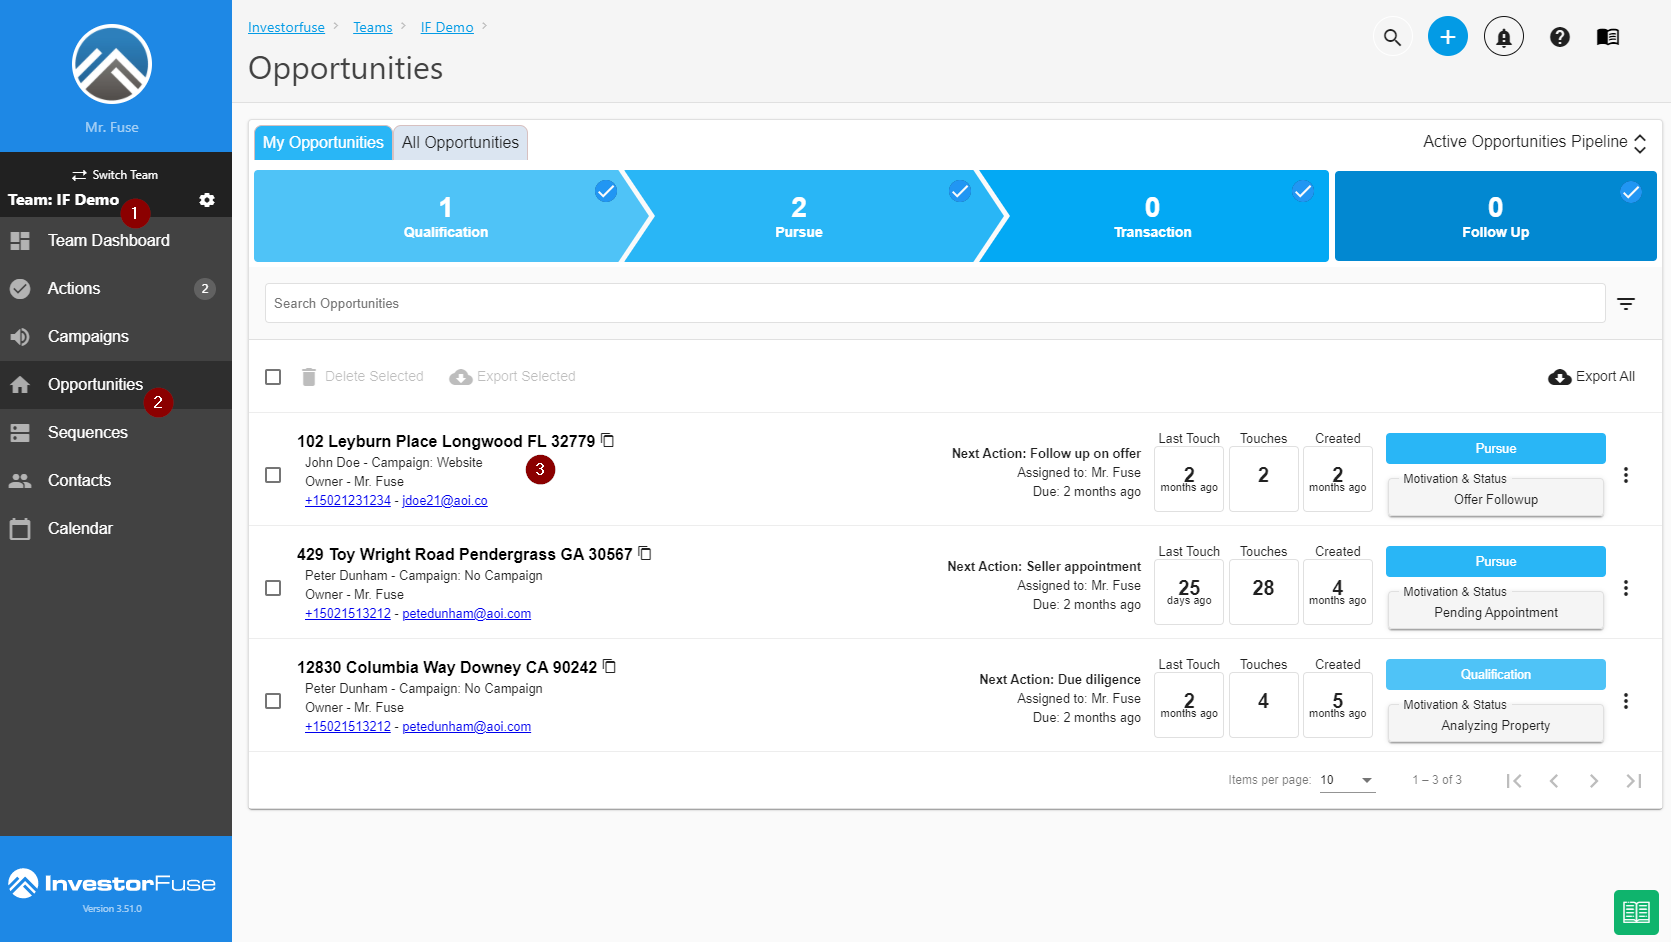
- Select any Team in the left menu
- Click Opportunities
- Click any Opportunity/Property Address to view the Opportunity
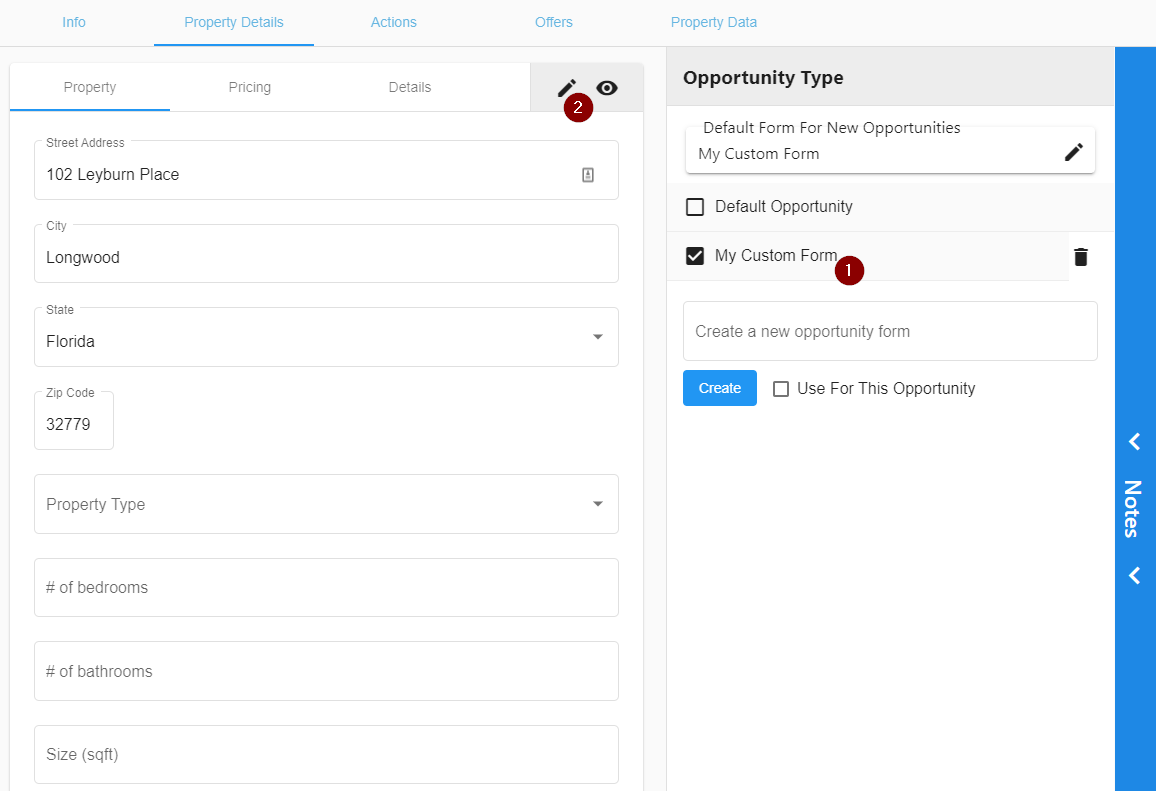
- Click Property Details
- Enter the name of the form you wish to create
- Click Use for This Opportunity if you want to use this new form for the current location
- Click Create


Your new form will appear in the list of selections and if you selected Use for This Opportunity it will also switch to this new form. You'll know what form it is using based on the checkmark next to the Form name.
Edit an Opportunity Form
Once you have created your form you'll want to customize it to your needs. Each form will automatically be created with the default form fields and can be adjusted accordingly.
- Select the Form you want to customize from the dropdown menu
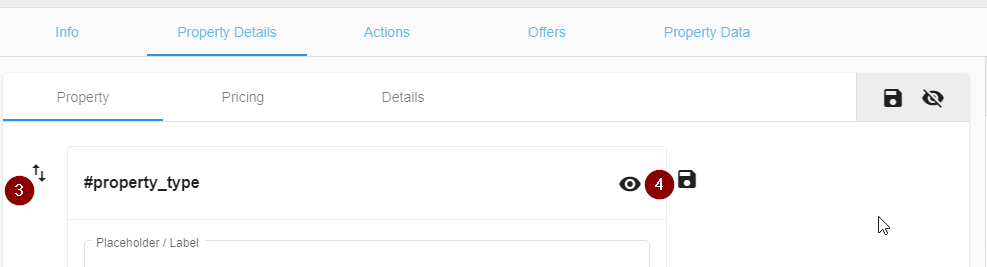
- Click ✏️ the Pencil icon to enter Edit mode
- To re-order your list click and drag the arrow icons to the left of each field
- To hide a field click ✏️ the Pencil icon to the right of the field and click the eye/View icon that appears and click the Save icon. Not all fields can be hidden such as the address fields.
- Add a field by scrolling to the end of the list and start by typing in the Field ID name
- Once you've typed the name in it will allow you to click Add Field
- To edit an existing field click the Pencil/Edit icon next to the field


.png)
After you add a new field (or edit an existing field) you'll have multiple various options of data you can add to your form.
Placeholder/Label
This is the name of your Form Field which appears on each form inside the text box. You can use the entire width of the text box if needed to give a good descriptor of what information you want captured.
Field Type
You can create sub-sets of static data to select depending on the Field Type selected. This gives you the control of keeping your data consistent throughout for reporting reasons or you can allow flexibility if that is not a concern. For example a dropdown menu may be desired for the Property Type (Single Family, Duplex, Commercial, etc.) so that a user cannot add data in the field that no one else understands or misspells, etc.
Standard Text Input - Textbox allows one line of manually typed text
Multi Line Text Input - Textbox allows unlimited lines of manually typed text
Number input - allows only numeric content
Email input - Allows regular text or an email address
Telephone Input - Allows for a phone number with area code and/or country code
Date Selector - Date input selection
Time Selector - Time input selection
Web Link - URL link
Select control - this allows you to create a list of allowable selections for this field. Type each item in your list separated by a comma.
Radio Group - this allows for a checkbox for the user to select certain criteria. Type each item in your list separated by a comma.
Checkbox - this is for one single field that can be checked or left unchecked. The name added to the Placeholder/Label will appear next to the checkbox.
Calc Field - to create an equation using basic math operations like add, subtract, multiply, and divide
8. After you make your selections be sure to click the Save icon next to the field(s) you have changed as well as the Save icon for the entire Form in the upper right corner.
Delete an Opportunity Form
- Click 🗑️ the trash can icon next to the opportunity form

Learn more about Creating a Custom Opportunity Form
Was this article helpful?