Interacting with your Calendar
- 28 Nov 2022
- 1 Minute to read
- Contributors


- Print
- Comment
- DarkLight
Interacting with your Calendar
- Updated on 28 Nov 2022
- 1 Minute to read
- Contributors
- Print
- Comment
- DarkLight
Article Summary
Share feedback
Thanks for sharing your feedback!
The Calendar shows your entire Team's schedule all in one location. The Calendar is connected to your "Schedule Seller Appointment" Activities in your Opportunities so once these actions are set you'll see the appointment on the Calendar view.
While the calendar items can only be added via your Opportunity Actions section using the Schedule Seller Appointment, from this view you can see the appointment and contact information and you can click into the Opportunity if you decide you need to get more information or to edit the Opportunity.
View your Calendar
- Select any Team in the left menu
- Click Calendar
- Click the arrows left/right to move to the previous or following month
- Click the arrows next to the month and year to select any month and/or year desired
- If you want more information on any event in the calendar click on the event
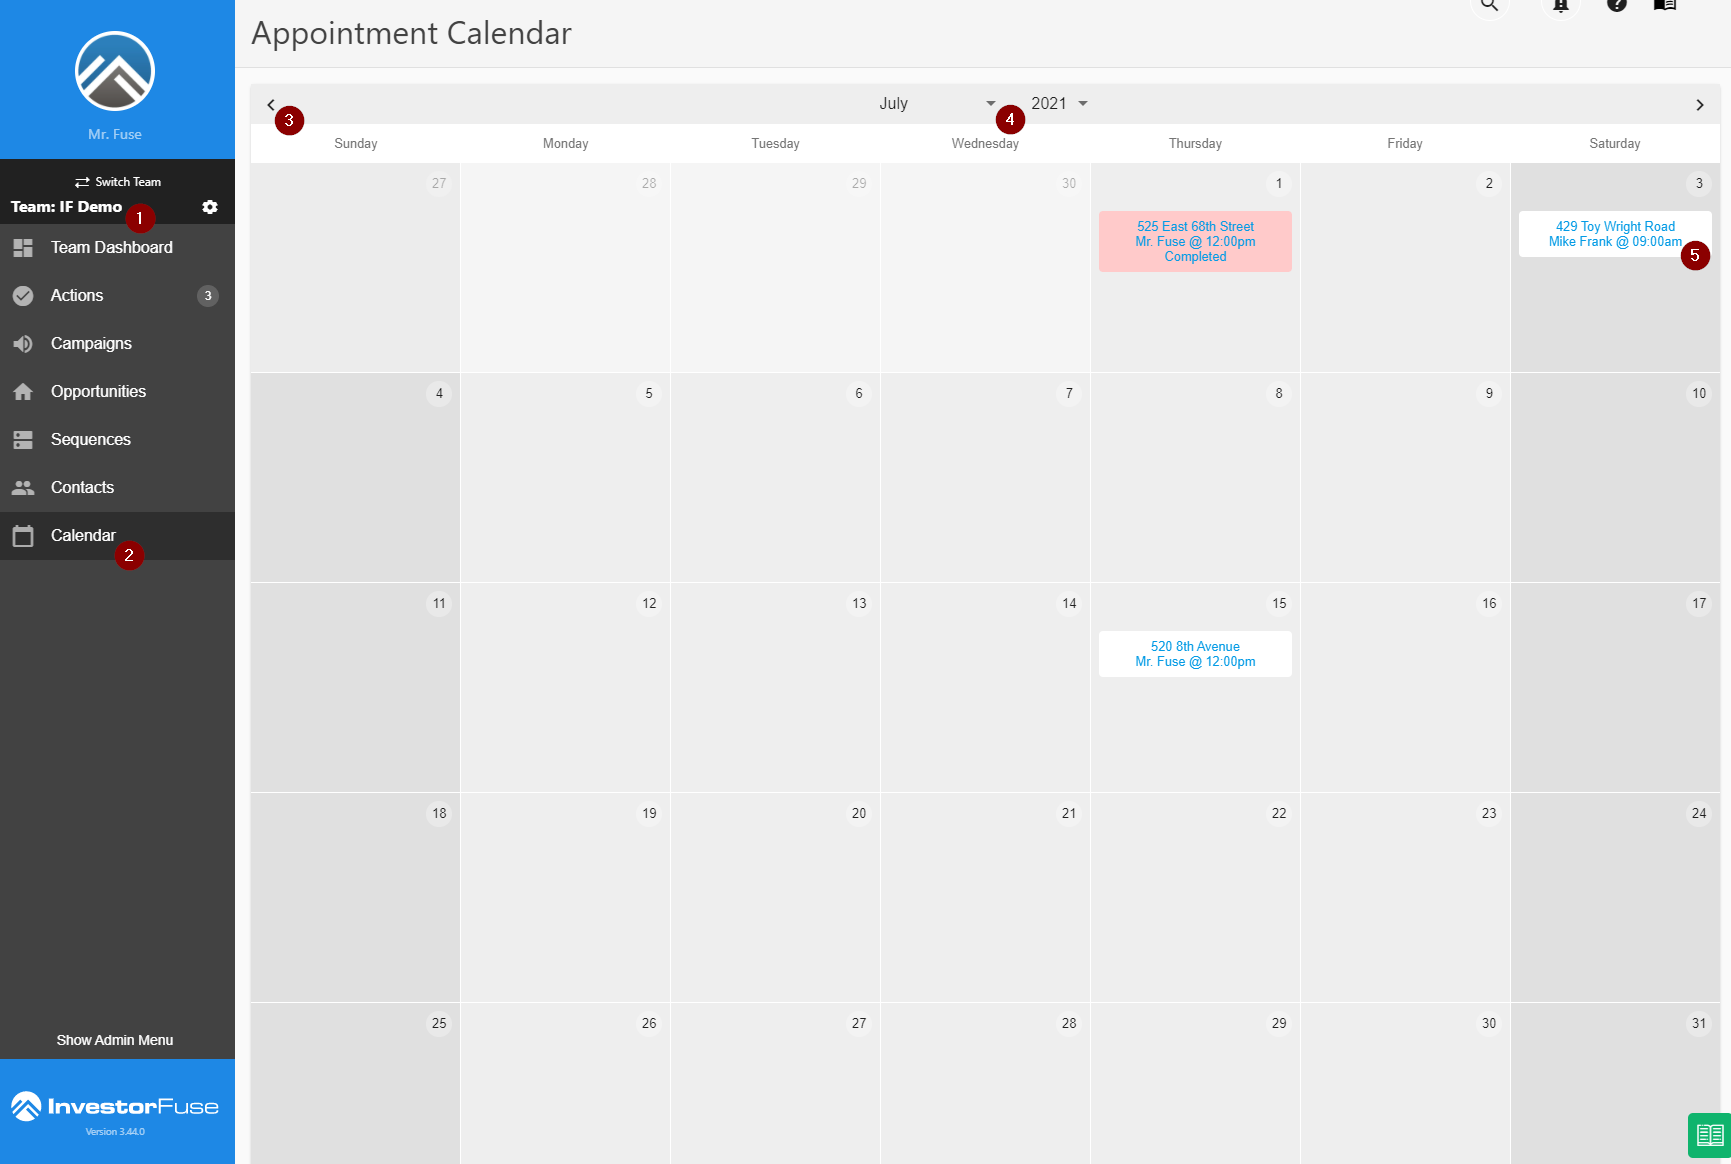

Canceled and Completed appointments will turn red to distinguish them from upcoming ones.
If the Opportunity is fully populated you'll see the following information about the event from the Calendar view.
- Appointment date and time
- The person assigned to the appointment
- The address of the property / Opportunity
- The Seller name, email address and phone number
If you need further information or decide to edit this Opportunity you can click the Details button which will route to the Opportunity

Add or Edit a Calendar Event
Creating an event in the Calendar is done via the Opportunity Action when you create the Action Schedule Seller Appointment.
When an Action is set to Schedule Seller Appointment the person assigned to the Action and the Seller will receive an email with an attachment for a meeting invite.
You cannot move a calendar item from this view nor can you edit from here but they can be edited from the Opportunity within the Action as long as the Action has not been completed. If the Action was completed (i.e. in the past) you cannot edit it.
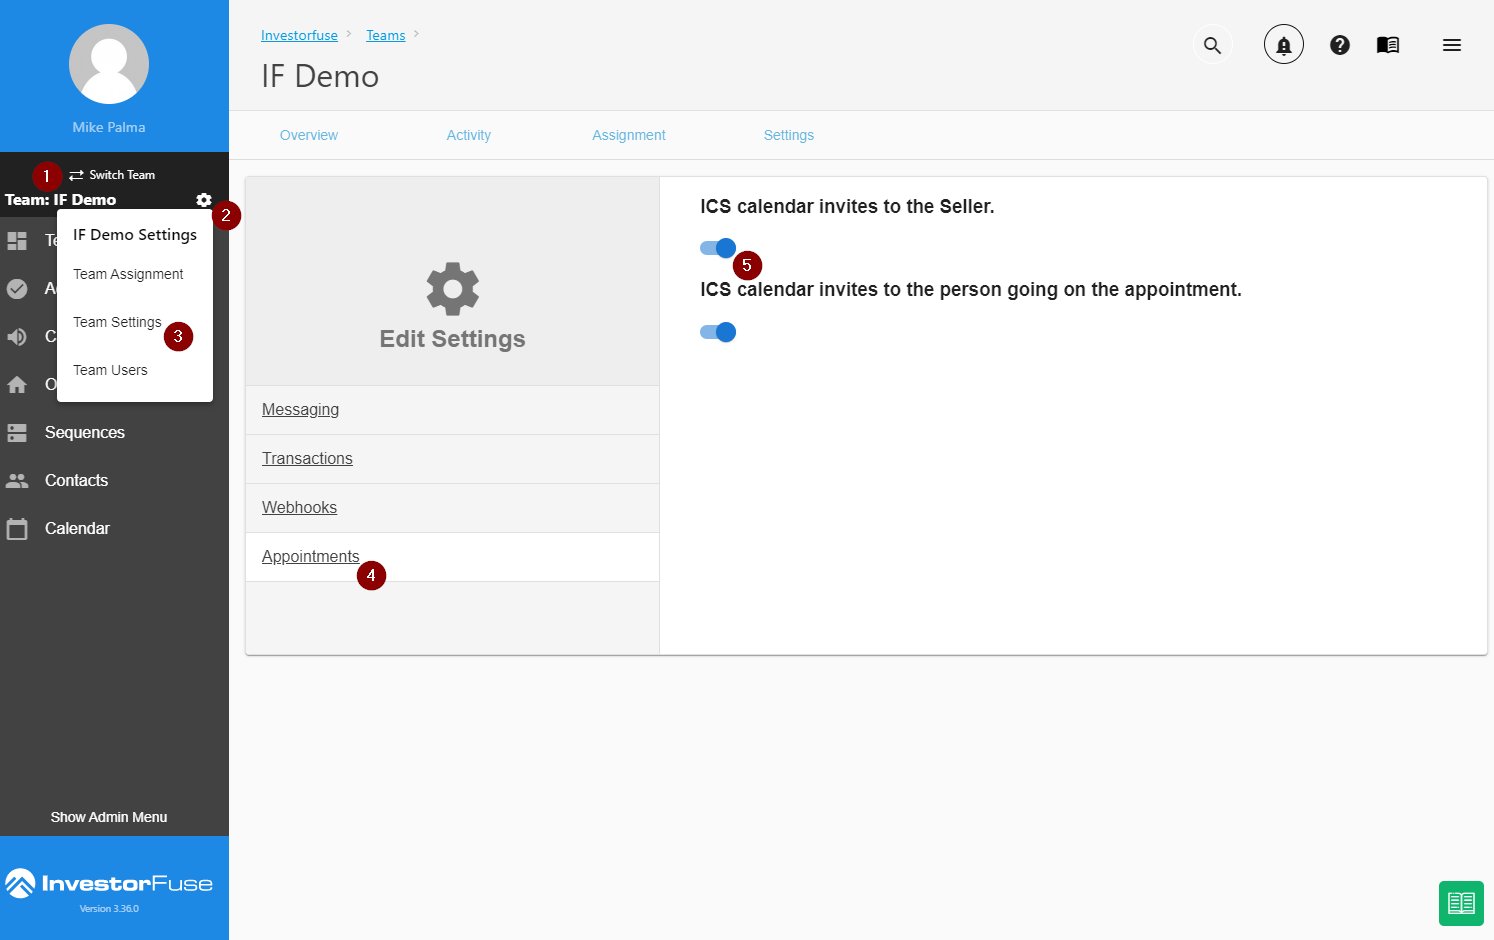
Enable or Disable ICS Invites
When an appointment is scheduled, a confirmation email with an ICS invite is automatically sent to the seller and the assignee of the appointment that can be imported to a calendar of your choosing. You can adjust this setting to turn it on or off. This setting is on by default.
- Select a team on the left menu
- Click ⚙️ the gear icon
- Select Team Settings
- Click Appointments
- Click the slider to turn the setting on or off

Was this article helpful?