Workflows
- 21 Oct 2022
- 2 Minutes to read
- Contributors


- Print
- Comment
- DarkLight
Workflows
- Updated on 21 Oct 2022
- 2 Minutes to read
- Contributors
- Print
- Comment
- DarkLight
Article Summary
Share feedback
Thanks for sharing your feedback!
Workflows is a way to run a predetermined set of automation as soon as something happens to an Opportunity. There are two (2) types of Workflows. First is the Status Workflow which uses a status as the trigger to run the automation meaning you could set up a task, webhook, and/or email notification to go out once an Opportunity is in a certain status. The other one is the Labels Workflow which uses Labels you have saved in the system as the trigger and executes the same automation as soon as the Label is added to the Opportunity.
Pro and Premium Feature
Workflows is only available for Pro and Premium users. If you are on the Essentials plan and you wish to upgrade, please email billing@investorfuse.com or send a chat to our support team.
Create a Status Workflow
You can also set up Workflows for Transaction Statuses. For example, you can set it up where if a deal is marked 'Marketing being created' status, you can automatically assign someone a task to upload all pictures to the Dropbox folder.
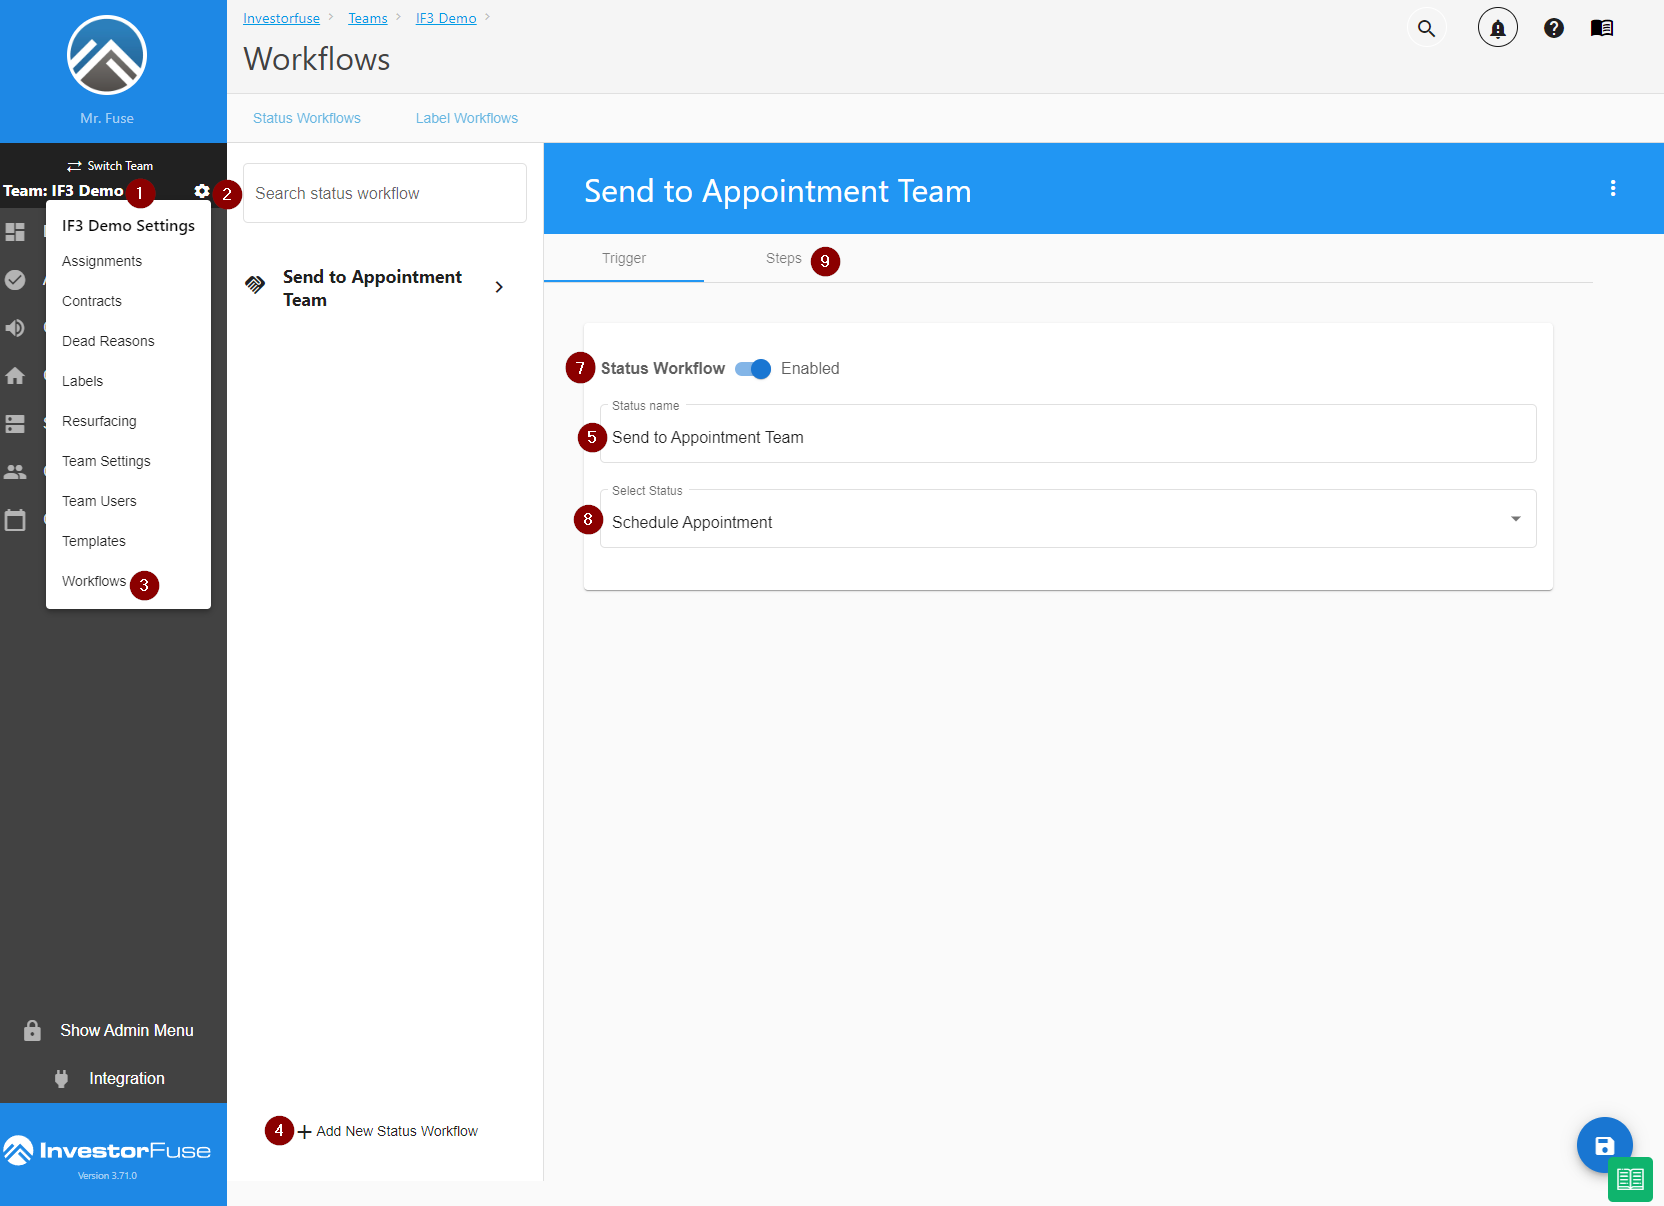
- Select a team you wish to view
- Click ⚙️ the cogwheel icon to open more settings
- Select Workflows in the options and it will take you to the Status Workflows by default
- Click +Add new status workflow at the bottom of the page
- Enter a name for the Workflow
- Click the Save button
- Use the toggle to turn the Status Workflow on or off
- Select a status that will trigger the Workflow. If you want to create a workflow for Transactions, select a Transaction status in this field.
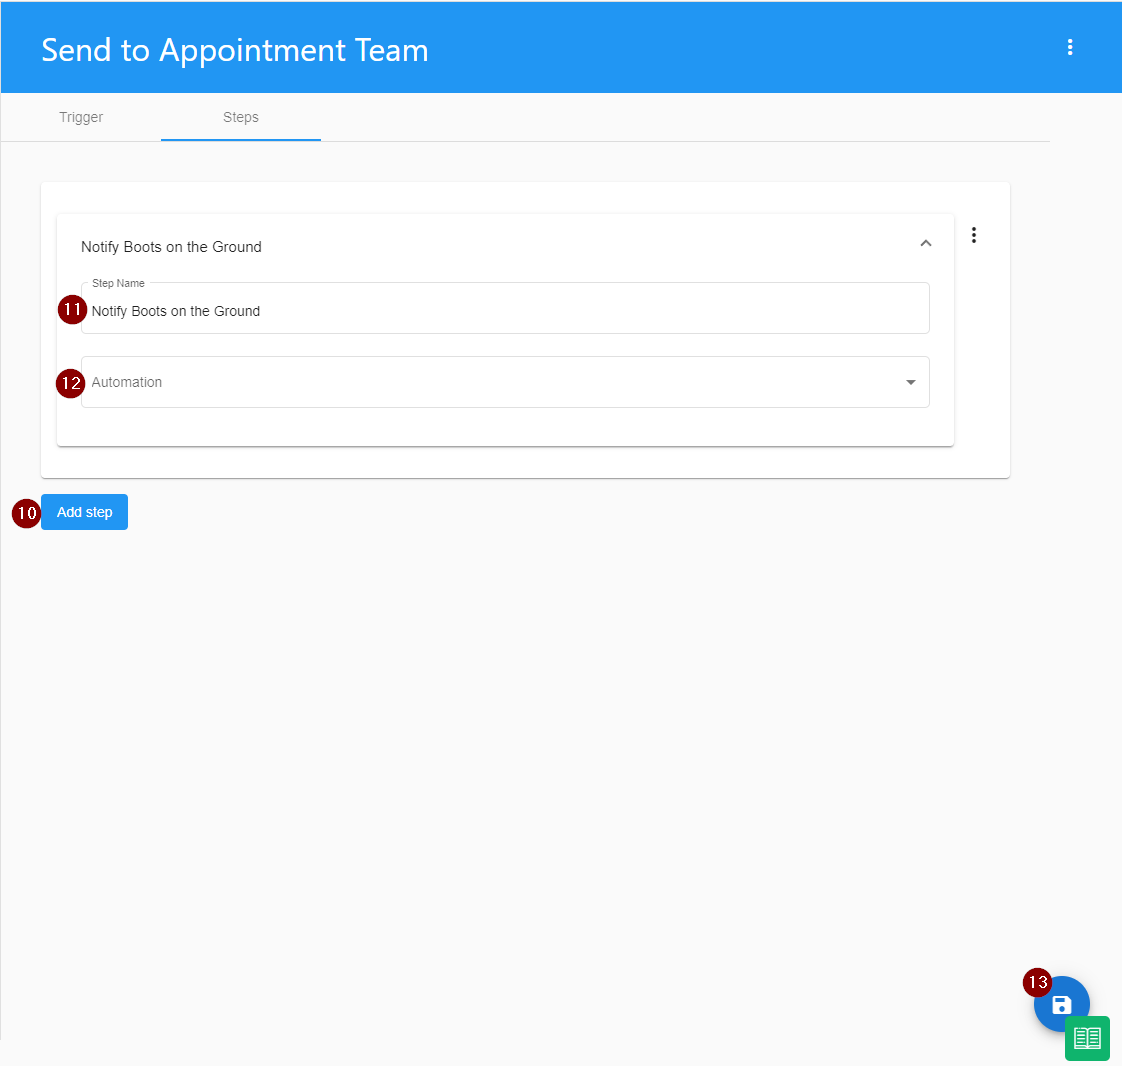
- Go to the Steps Tab
- Start adding steps using the Add Step button. The steps will be executed once an Opportunity is moved to the trigger status. You can add more than one step.
- Enter the internal Step Name
- Choose the Automation
- Assign a team member a task that will appear in their Actions
- Send the details of the opportunity to a webhook. This lets you push the opportunity to a third-party platform like a spreadsheet for whatever use case.
- Send someone an email notification with the details of the opportunity attached
- Click 💾 the Save button at the bottom-right corner


Create a Label Workflow
You must have Labels saved in your system to be able to create a Label Workflow. Click here to learn more about adding Labels.
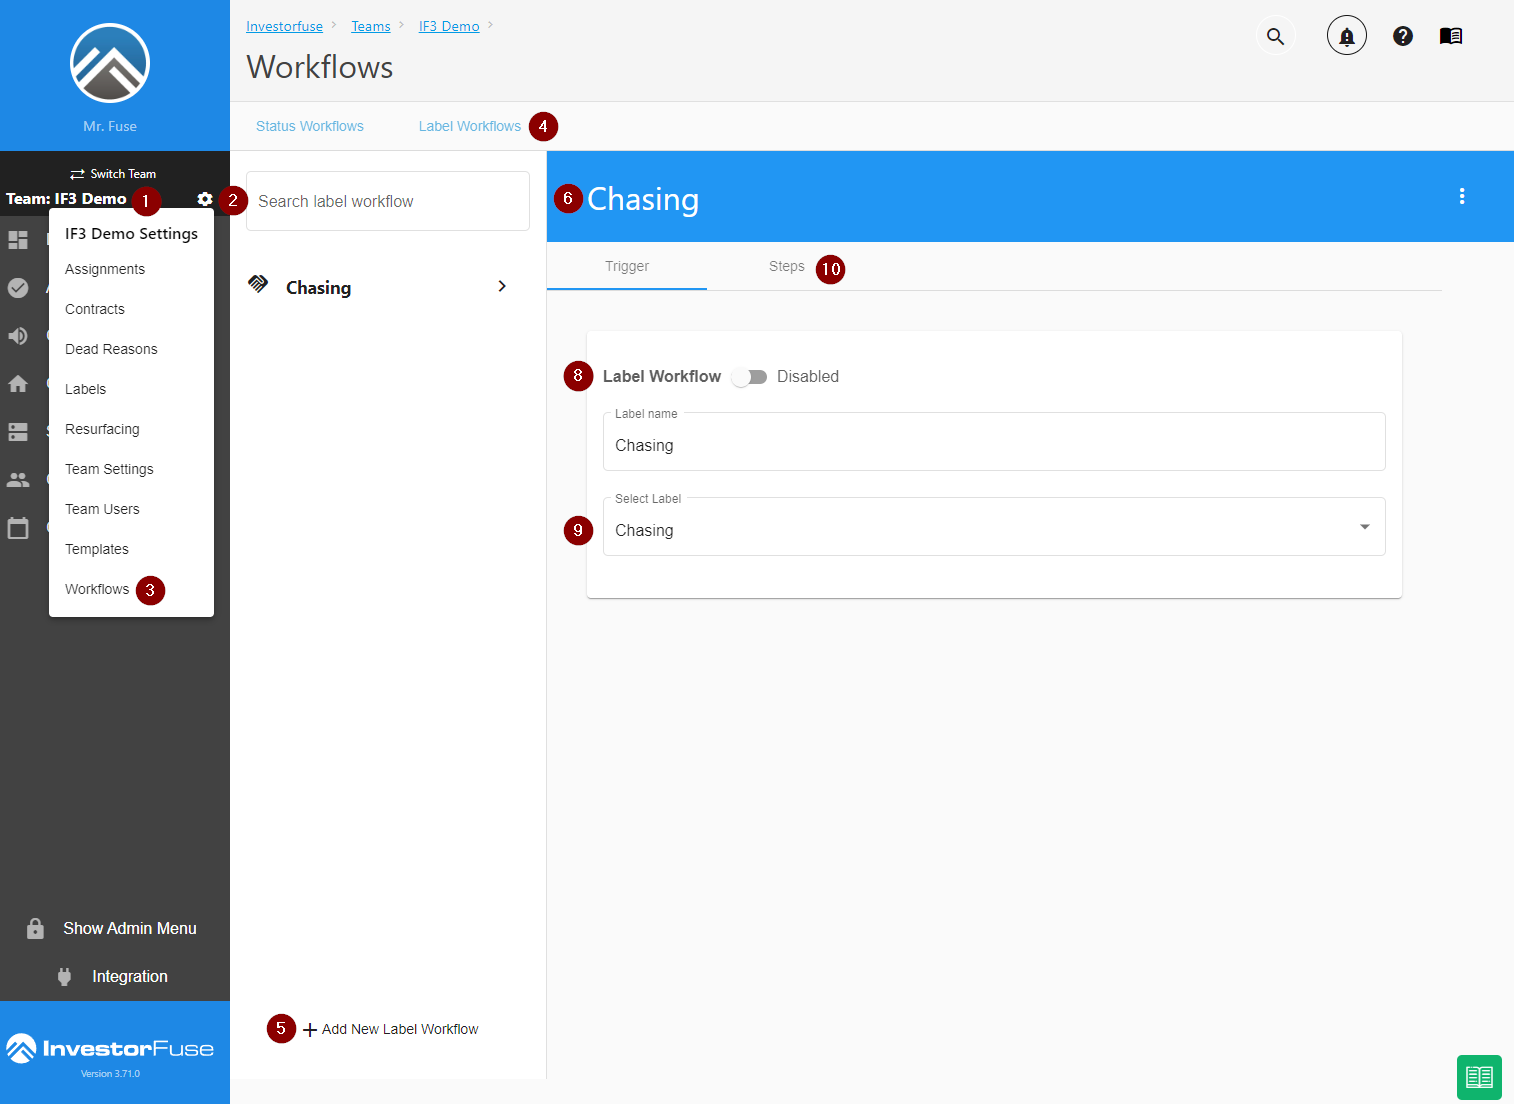
- Select a team you wish to view
- Click ⚙️ the cogwheel icon to open more settings
- Select Workflows in the options and it will take you to the Status Workflows by default
- Go to the Labels Workflow tab
- Click +Add New Label Workflow to create one
- Enter a name for the Workflow
- Click the Save button
- Use the toggle to turn the Workflow on or off
- Select a Label to trigger the Workflow. There must be Labels saved for them to appear as options in the drop-down.
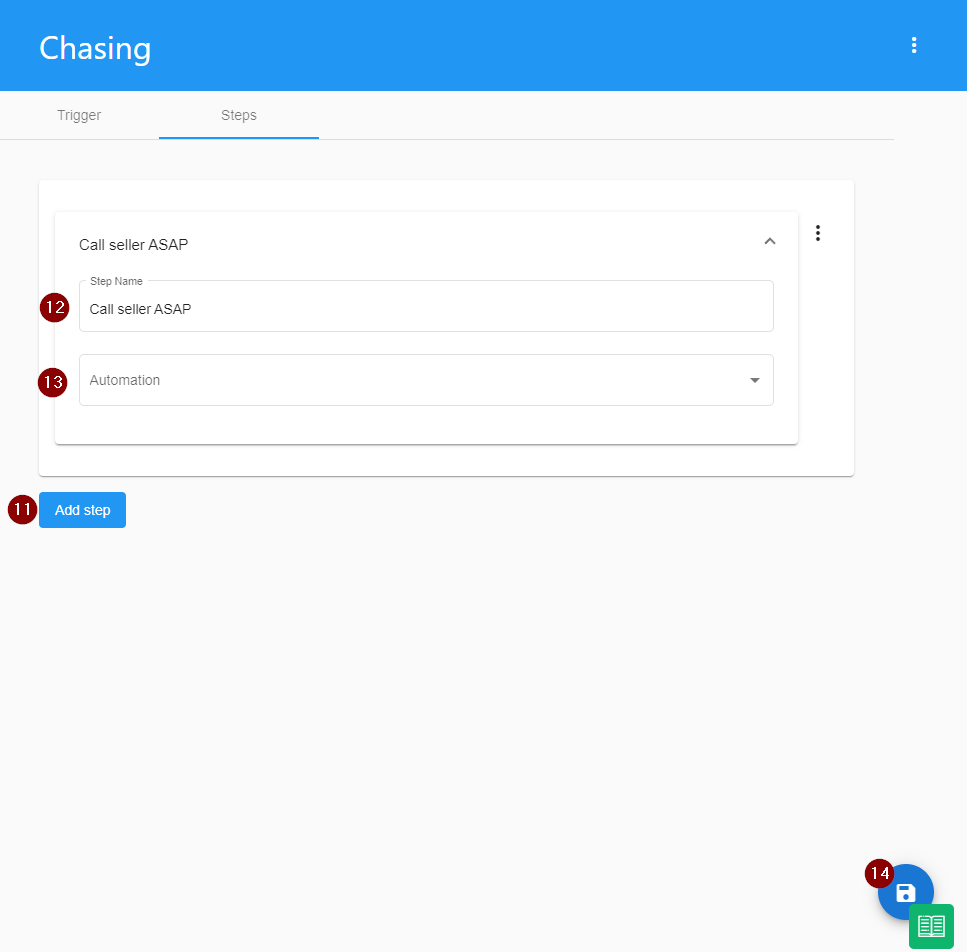
- Go to Steps tab
- Start adding steps using the Add Step button. The steps will be executed once the selected Label trigger is added to an Opportunity.
- Enter the internal Step Name
- Choose the Automation
- Assign a team member a task that will appear in their Actions
- Send the details of the opportunity to a webhook. This lets you push the opportunity to a third-party platform like a spreadsheet for whatever use case.
- Send someone an email notification with the details of the opportunity attached
- Click 💾 the Save button at the bottom-right corner of the page


Was this article helpful?